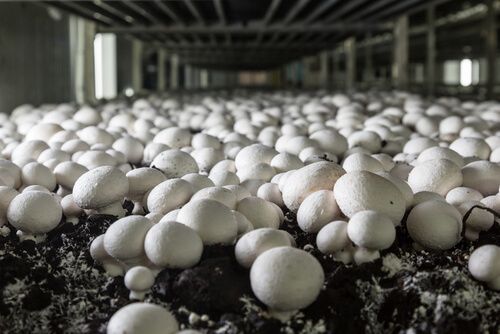
Mushrooms are fungi, that grow and live in organic material. Growing mushrooms is also called fungi culture. The business of growing them is a mushroom farm.
Mushroom farming is one of the most profitable agri-business that you can start with low investment and space. Mushroom cultivation is growing gradually as an alternative source of income for many people. Worldwide, China, US, Italy and Netherlands are the leading producers of mushrooms.
Why a Mushroom Farming Business
There are many good reasons to start a large-scale mushroom farming business:
- Mushrooms can be grown around the year.
- Mushrooms are grown indoors, so not directly impacted by weather as is a typical problem in farming.
- Waste can be recycled.
- High-protein foods are in demand and mushrooms are high protein.
- With a good business plan for expansion, you can start small and grow.
- Empty industrial buildings have the potential for growing mushrooms in urban farming settings.
In this article, we will tell you the complete method to cultivate button mushrooms, paddy straw mushrooms, and oyster mushrooms.
Types of Mushrooms
There are different types of mushrooms grown around the world. They are as follows;
- Button mushrooms,
- Paddy straw mushrooms and
- Oyster mushrooms
These are the three major types used for cultivation in India. Button mushrooms grow during the winter season. Paddy straw mushrooms can grow in temperatures ranging from 35- 40 Degree Celcius. Oyster mushrooms on the other hand are grown in the northern plains. All these mushrooms of commercial importance are grown by different methods and techniques. Mushrooms are grown in special beds known as compost beds. We will learn in detail about the process of Mushroom farming below.
How to Grow Button Mushroom
Details process of growing Button Masgroom are described below in 5 steps:
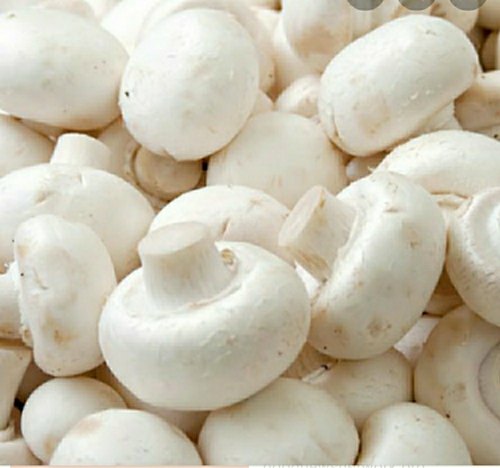
1. Making Compost
The first step to growing mushrooms is composting which is done in the open. Compost yard for button mushroom farming is prepared on clean, raised platforms made of concrete. They should be raised so that the excess water does not get collected at the heap. Though the composting is done in the open, it should be covered to protect it from rainwater. Compost prepared is of 2 types – natural & synthetic compost. The compost is made in trays of dimensions 100 X 50 X 15 cm.
Synthetic Compost for Mushroom Farming
The elements for synthetic compost include
- Wheat straw,
- Bran,
- Urea,
- Calcium ammonium nitrate/ammonium sulphate and
- Gypsum.
The straw should be cut to 8 to 20 cm. in length. It is then spread equally to form a thin layer on the composting yard. After this, it is soaked thoroughly by sprinkling water. The next step is to blend all other ingredients like urea, bran, gypsum, and calcium nitrate with the wet straw & mound them into a pile.
Natural Compost
Here are the ingredients for Natural Compost:
- Horse dung,
- Poultry manure,
- Wheat straw and
- Gypsum.
Wheat straw must be sliced finely. Horse dung should not be mixed with that of other animals. It must be freshly collected & not exposed to rain. After the ingredients are mixed, they are uniformly spread on the composting yard. Water is sprayed on the surface to wet the straws. It is heaped & turned like that for synthetic manure. Due to fermentation, the temperature of the heap goes up and it gives a smell because of ammonia escaping. This is a sign that the compost has opened. The heap is turned every three days and sprinkled with water.
Filling the Compost in Trays
The prepared compost is dark brown in colour. When you fill the compost into trays, it should be neither too wet nor too dry. If the compost is dry then spray a few drops of water. If too damp, then let some water evaporate. The size of the trays for spreading the compost could be as per your convenience. But, it must be 15 to 18 cm deep. Also, make sure that the trays are made of softwood. The trays must be filled with compost to the edge and levelled on the surface.
2. Spawning
Spawning is basically the process of sowing the mushroom mycelium into the beds. The spawns can be obtained from certified national laboratories at a nominal price. Spawning can be done in 2 ways – by scattering the compost on the bed surface in the tray or else mixing the grain spawn with compost before filling the trays. After spawning cover the trays with old newspapers. The sheet is then sprinkled with little water to maintain moisture & humidity. There must be a headspace of at least 1 meter between the top tray and the ceiling.
3. Casing
Casing soil is made by mixing finely crushed and sieved, rotten cow dung with the garden soil. The pH should be on the alkaline side. Once ready, the casing soil has to be sterilized to kill the pests, nematodes, insects & other moulds. Sterilization can be done by treating it with a formalin solution or by steaming it. After the casing soil is spread on the compost the temperature is maintained at 25⁰C for 72 hours & then lowered to 18⁰C. Remember that the casing stage requires a lot of fresh air. Therefore the room must have sufficient ventilation facilities during the casing stage.
4. Cropping
After 15 to 20 days of the casing, the pinheads start becoming noticeable. White-coloured, small-sized buttons start developing within 5 to 6 days of this stage. Mushrooms are ready for harvesting when the caps are placed tight on the short stem.
5. Harvesting
During harvesting, the cap should be twisted off gently. For this, you need to hold it gently with the forefingers, press it against the soil & then twist it off. The base of the stalk in which mycelial threads & soil particles cling should be chopped off.
How to Grow Paddy Straw Mushroom
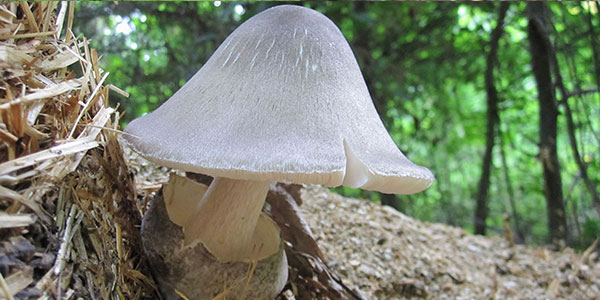
Paddy straw mushroom is grown in Southeast parts of Asia. It is one of the most popular mushrooms owing to its taste. Unlike button mushrooms, they are grown on raised platforms under shadow or in well-ventilated rooms.
1. Spawning
Paddy straw mushrooms are spawned on chopped, soaked paddy straws. At times they are spawned on cereal grains or millets. When they are spawned on paddy straw, they are known as straw spawn and when spawned on cereal grains, they are called grain spawn.
Well-dried and long straws are tied together in bundles of 8 to 10 cm in diameter. Then they are chopped to a uniform length of 70 to 80 cm & soaked in water for 12 to 16 hours. Excess water is then drained off.
2. Bed Preparation
Since the mushrooms are cultivated on raised platforms, the foundations made of bricks & soil ought to be raised. The size must be a little larger than the bedding and should be strong enough to hold the weight of the bed. A bamboo frame of the size of the foundation is put on top of the foundation. At least 4 bundles from the soaked straw are put on the frame. Another 4 bundles are located but with the loose ends in the opposite direction. These 8 bundles together make up the 1st layer of bedding. Around 12 cm away from the 1st layer, the grain spawn is scattered.
After the last layer is made, cover the whole bed with a transparent plastic sheet. However proper care must be taken to make sure that the sheet is not in contact with the bed.
3. Mushrooming
Usually, mushrooms begin to grow within 10 to 15 days of spawning. They continue to grow for the next 10 days. Once the volva erupts & the mushroom inside is exposed, the crop is ready for harvesting. These mushrooms being very fragile have a very short shelf life hence they must be consumed fresh.
How to grow Oyster Mushroom
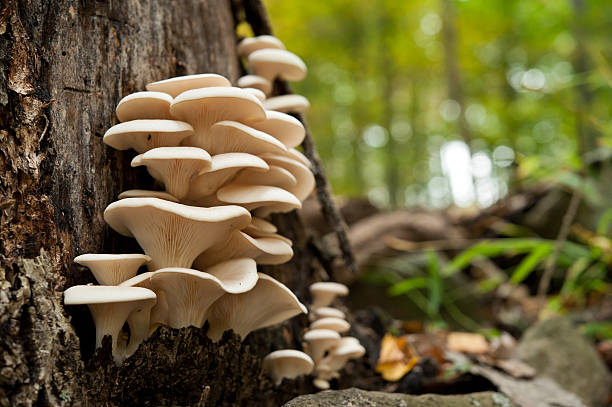
Oyster Mushroom is grown where the climatic conditions are not good for the button mushrooms. It is the simplest to grow & most delicious to eat. Being very low in fat content it is usually suggested for controlling obesity & also for patients suffering from diabetes, and blood pressure.
Oyster mushrooms can grow at a moderate temperature that ranges from 20 – 300 C and humidity of 55-70 per cent for a period of 6 – 8 months in a year. It can also be cultivated in the summer season by providing the extra humidity needed for its growth. In hilly areas – the best growing season is from March or April to September or October while in the lower regions it is from September or October to March or April.
The process for oyster mushroom cultivation can be divided into the following 4 steps:
- Preparation of spawn
- Substrate preparation
- Spawning of substrate
- Crop management
Oyster mushrooms can be cultivated on several agro-wastes having cellulose & lignin that helps in more enzyme production of cellulose, which is correlated with more yield. These consist of straw of paddy, wheat/ragi, stalk & leaves of maize, millets, and cotton, used citronella leaf, sugarcane bagasse, sawdust, jute, and cotton waste, used tea leaf waste, useless waste paper, and synthetic compost of button mushrooms, etc. It can also be cultivated with the use of industrial wastes such as paper mill sludges, coffee byproducts, tobacco waste, etc.
Cost of Mushroom Cultivation
Nowadays, mushroom industries are growing rapidly in terms of market value, demand and beneficial effects. Many young farmers want to grow mushrooms and the main query related to mushroom farming is ‘what is the cost required to grow mushroom cultivation?’. Here, we have an estimated answer to this question.
The total cost of mushroom cultivation in India is approx Rs. 1,50,000. That includes Scrap Wooden Shelves (Rs. 20,000), Cost of Construction for rooms (Rs. 1,25,000), and other Miscellaneous Costs (Rs. 5000).
Mushroom Farming Training in India
At present, the government is focusing on agriculture, and they provide training to farmers for better and effective productivity. Joining mushroom cultivation training by the government is the best opportunity if you are interested in Mushroom farming. With that, in this tech-savvy world, you can take mushroom cultivation training online, which is the easiest way to learn.
These are all about Mushroom farming and possess to grow different types of mushroom. In last, we show where to take Mushroom Farming Training. I hope you got all the detailed information regarding mushroom farming in India. Now, you can easily grow mushrooms and earn a lot of profit. For more information, stay connected with Upvey.
Financial and Business expert having 30+ Years of vast experience in running successful businesses and managing finance.


